Install NPM


This template has include the 3rd party plugins and libraries in assets/[css,js]/vendors/ But in modern development exclude 3rd party packages from project and use package manager like npm or yarn to install them. To begin installation please follow this guide bellow:
  • Connect to the internet
  • Install NodeJs from NodeJs Official Page
  • Unzip the file to a folder in your computer
  • Open Terminal
  • Go to your file project (where you've unzipped the product)
  • Install Modules
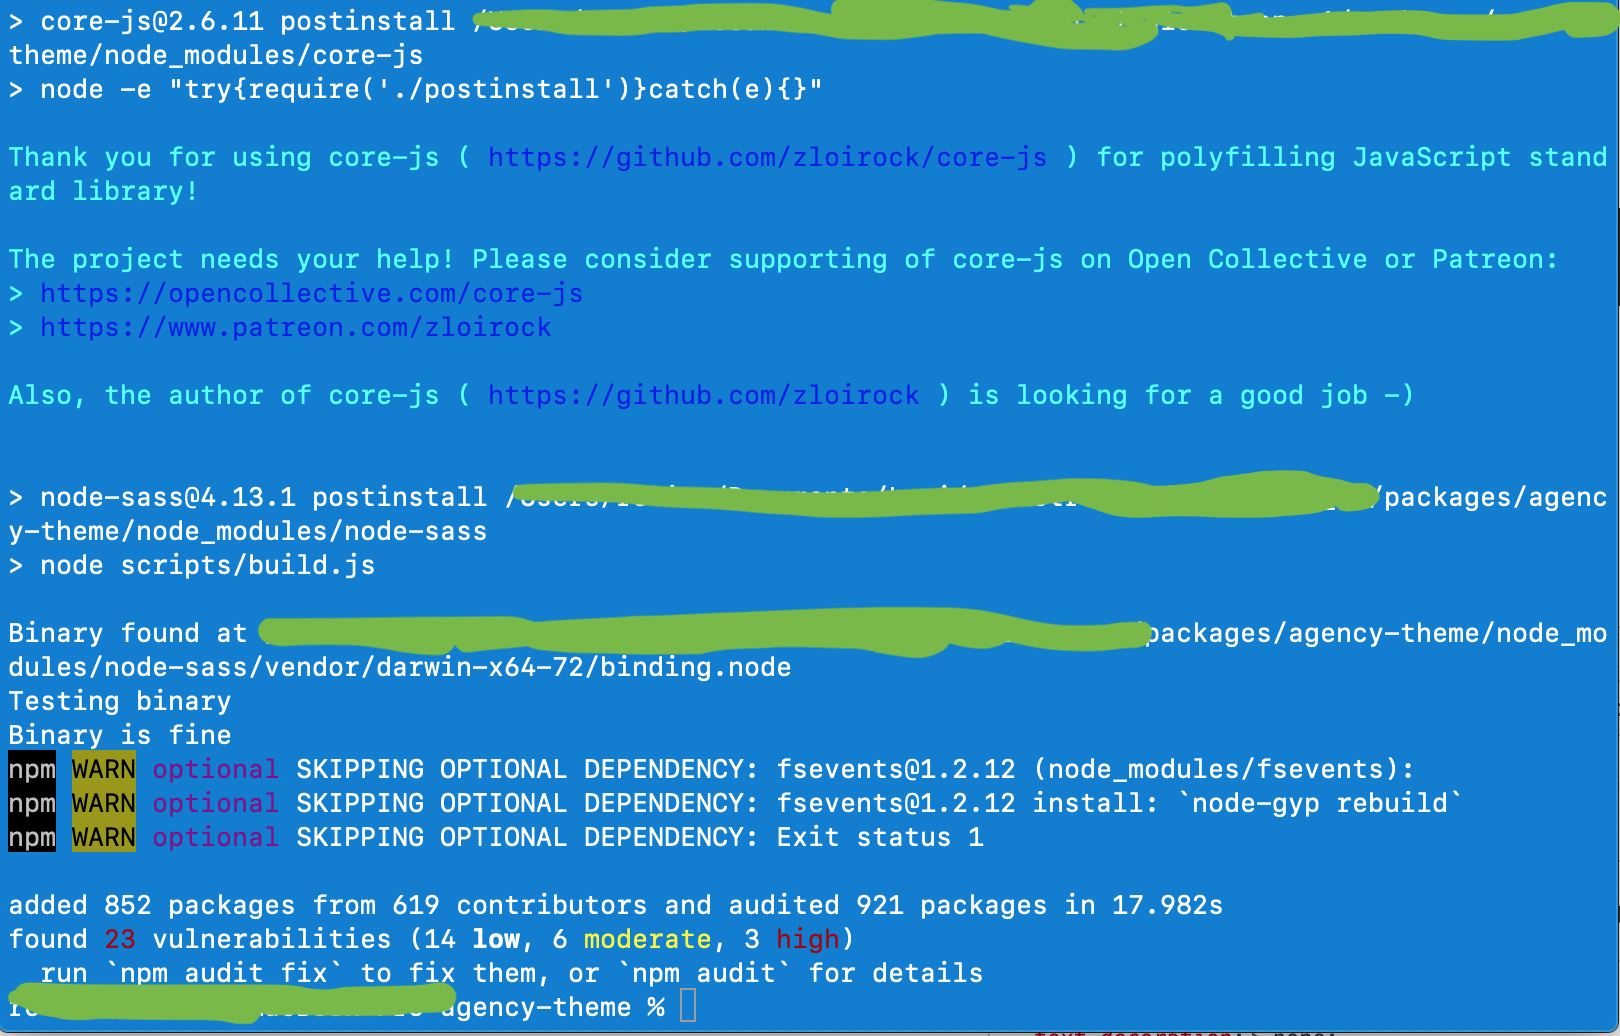
    Install module dependencies by run this script in terminal
    npm install
    It will download some necessary dependencies, and just wait until finish.
    process

Use HTML, CSS, JS


View and Edit HTML

  • After extract the package just open the HTML file
  • In example index.html
  • To view it you can open in browser
  • To edit it you can open in text editor (sublime, visual studio code, atom, bracket, etc). After edit and save, please open or reload in browser to see the changes

Change HTML layout and theme

To change HTML layout and theme is applicable in every .html file

  • RTL and LTR layout:
    1. In html file change the dir and lang attribute in body tag
      - LTR
      <html lang="en" dir="ltr">
      - RTL
      <html lang="ar" dir="rtl">
    2. Change the css vendor framworks, which are bootstrap.css and materialize.css with rtl version
      <link href="assets/css/rtl-vendors/bootstrap-rtl.css" rel="stylesheet">
      <link href="assets/css/rtl-vendors/materialize-rtl.css" rel="stylesheet">
      
    3. Note: if you add another css plugin that need transform to rtl verion. Please visit https://rtlcss.com/
  • Theme Color
    1. In html file just change the class name
    2. For dark/light mode in .m-application by switch between .theme--dark or .theme--light
      - Dark mode:
      <div class="m-application theme--dark transition-page" id="app">
                                  
      - Light mode:
      <div class="m-application theme--light transition-page" id="app">
                                  
    3. For theme color in .m-content by change .[theme-name]-var with available theme from src/scss/utils/_color-var.scss - In example joker theme color
      <div class="m-content green-leaf joker-var" id="main-wrap">
                                  

Edit CSS and JS

This template use SCSS to create CSS by Gulp.js. More than that Gulp.js also use for merge css and js files to a single file.

We recommend to do not edit files: assets/css/styles.css and assets/js/scripts.js Because those are generated files, and will be replaced automatially by gulp.js. Please edit from the source in src/ folders
  • To add or modify css, please open src/scss/. If you add new scss files, don't forget to register it in src/scss/styles.scss
  • To add or modify js, please open src/js. If you add new js files, You don't need register it, it will automatically merge in assets/js/scripts after run gulp command bellow.
  • To build the js and css assets run
    gulp assets
    and for watch the changes
    gulp watch_assets
  • The result will be placed in:
    - CSS: assets/css/styles.css
    - JS: assets/js/scripts.css

Use HTML in different language


  • After extracting file, there will be multilang/ folder. Most of the text content is appropriate for that's language
  • In example for site with Bahasa Indonesia /multilang/id/index.html
  • To view it you can open in browser
  • To edit it you can open in text editor (sublime, visual studio code, atom, bracket, etc). After edit and save, please open or reload in browser to see the changes
  • The rest modification such as theme, js and css are same as described above.

Troublehooting


Here's most common error problem when installation and first setup project

  • if got warning like this :
    
    npm WARN slick-carousel@1.8.1 requires a peer of jquery@>=1.8.0 but none is installed. You must install peer dependencies yourself.
            
    Don't worry the app will run as well

    For warning some of dependencies need another dependencies too, maybe once you install them, there’s some changes from the 3rd party vendor so probably it will make a warning to another dependencies.

  • if got an error with a dependencies installation. Try to remove the all module node_modules/. Then install again with npm install. If error still happen, please try to remove the problematic package node_modules/ foler. After that try to install the problematic package manually. npm install ‹package_name› --save-dev
  • if still got an error. Try to update the problematic package instead.
  • If you get error messages when start project npm run dev like this
    ERROR in ./app/styles/layout/base.scss (./node_modules/css-loader/dist/cjs.js??ref--8-1!./node_modules/postcss-loader/src??ref--8-2!./node_modules/sass-loader/lib/loader.js??ref--8-3!./app/styles/layout/base.scss)
    Module build failed (from ./node_modules/sass-loader/lib/loader.js):
            
  • It mean the node-sass not installed succesfully. May because connection problem, changed node environment during installation, or blocked node-sass repository
  • Please install node-sass manually by npm install node-sass --save
  • Try to start project again npm start
  • You will get this warning message if not use HTTPS
    A cookie associated with a resource at http://doubleclick.net/ was set with `SameSite=None` but without `Secure`. A future release of Chrome will only deliver cookies marked `SameSite=None` if they are also marked `Secure`. You can review cookies in developer tools under Application>Storage>Cookies and see more details at https://www.chromestatus.com/feature/5633521622188032.
            
    Here's the guide to setup HTTPS:


Basic Code Structure


Folder structure

template-theme                                                                          
├── 404.html
├── README.md
├── assets
│   ├── css
│   ├── favicon.ico
│   ├── favicons
│   ├── images
│   └── js
├── blank-page.html
├── contact.html
├── crossdomain.xml
├── gulpfile.js
├── humans.txt
├── index.html
├── multilang
│   ├── ar
│   ├── de
│   ├── en
│   ├── id
│   ├── pt
│   └── zh
├── package-lock.json
├── package.json
├── robots.txt
└── src
    ├── api.json
    ├── js
    ├── locales
    ├── pug
    └── scss                                                                       
                        

Code preview


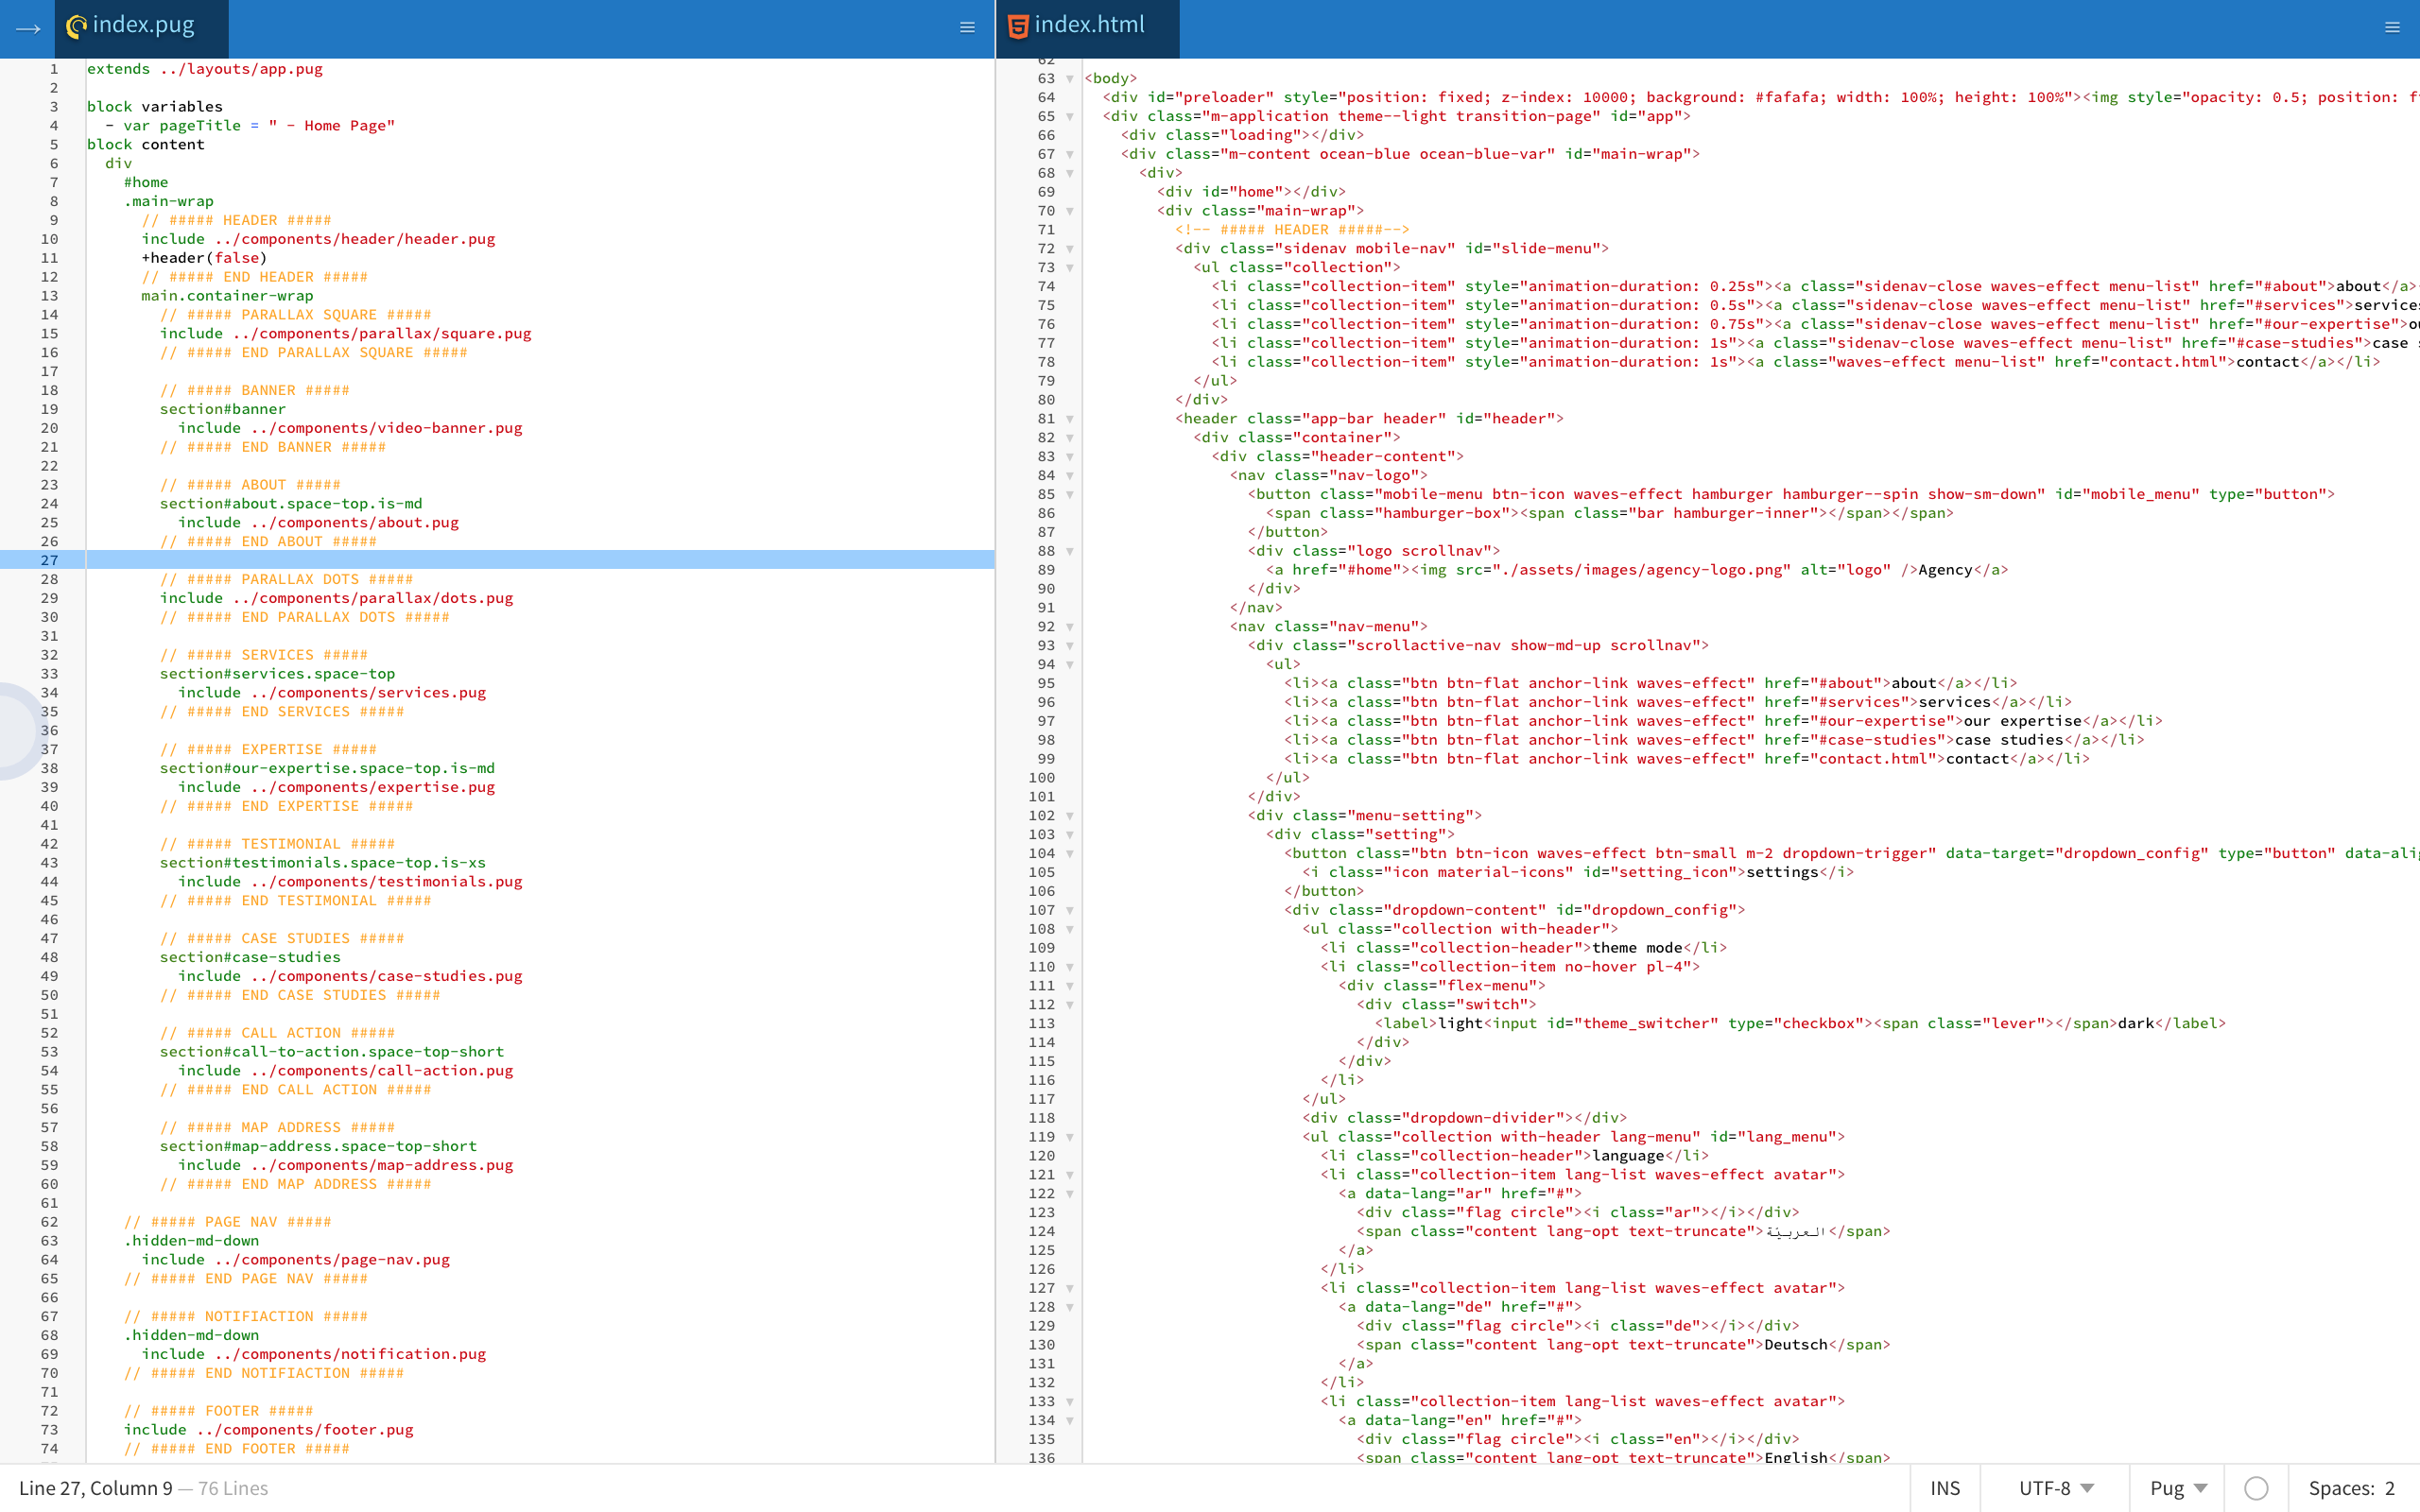
Landing Page

Landing page structure src/pug/pages/index.pug and index.html

code

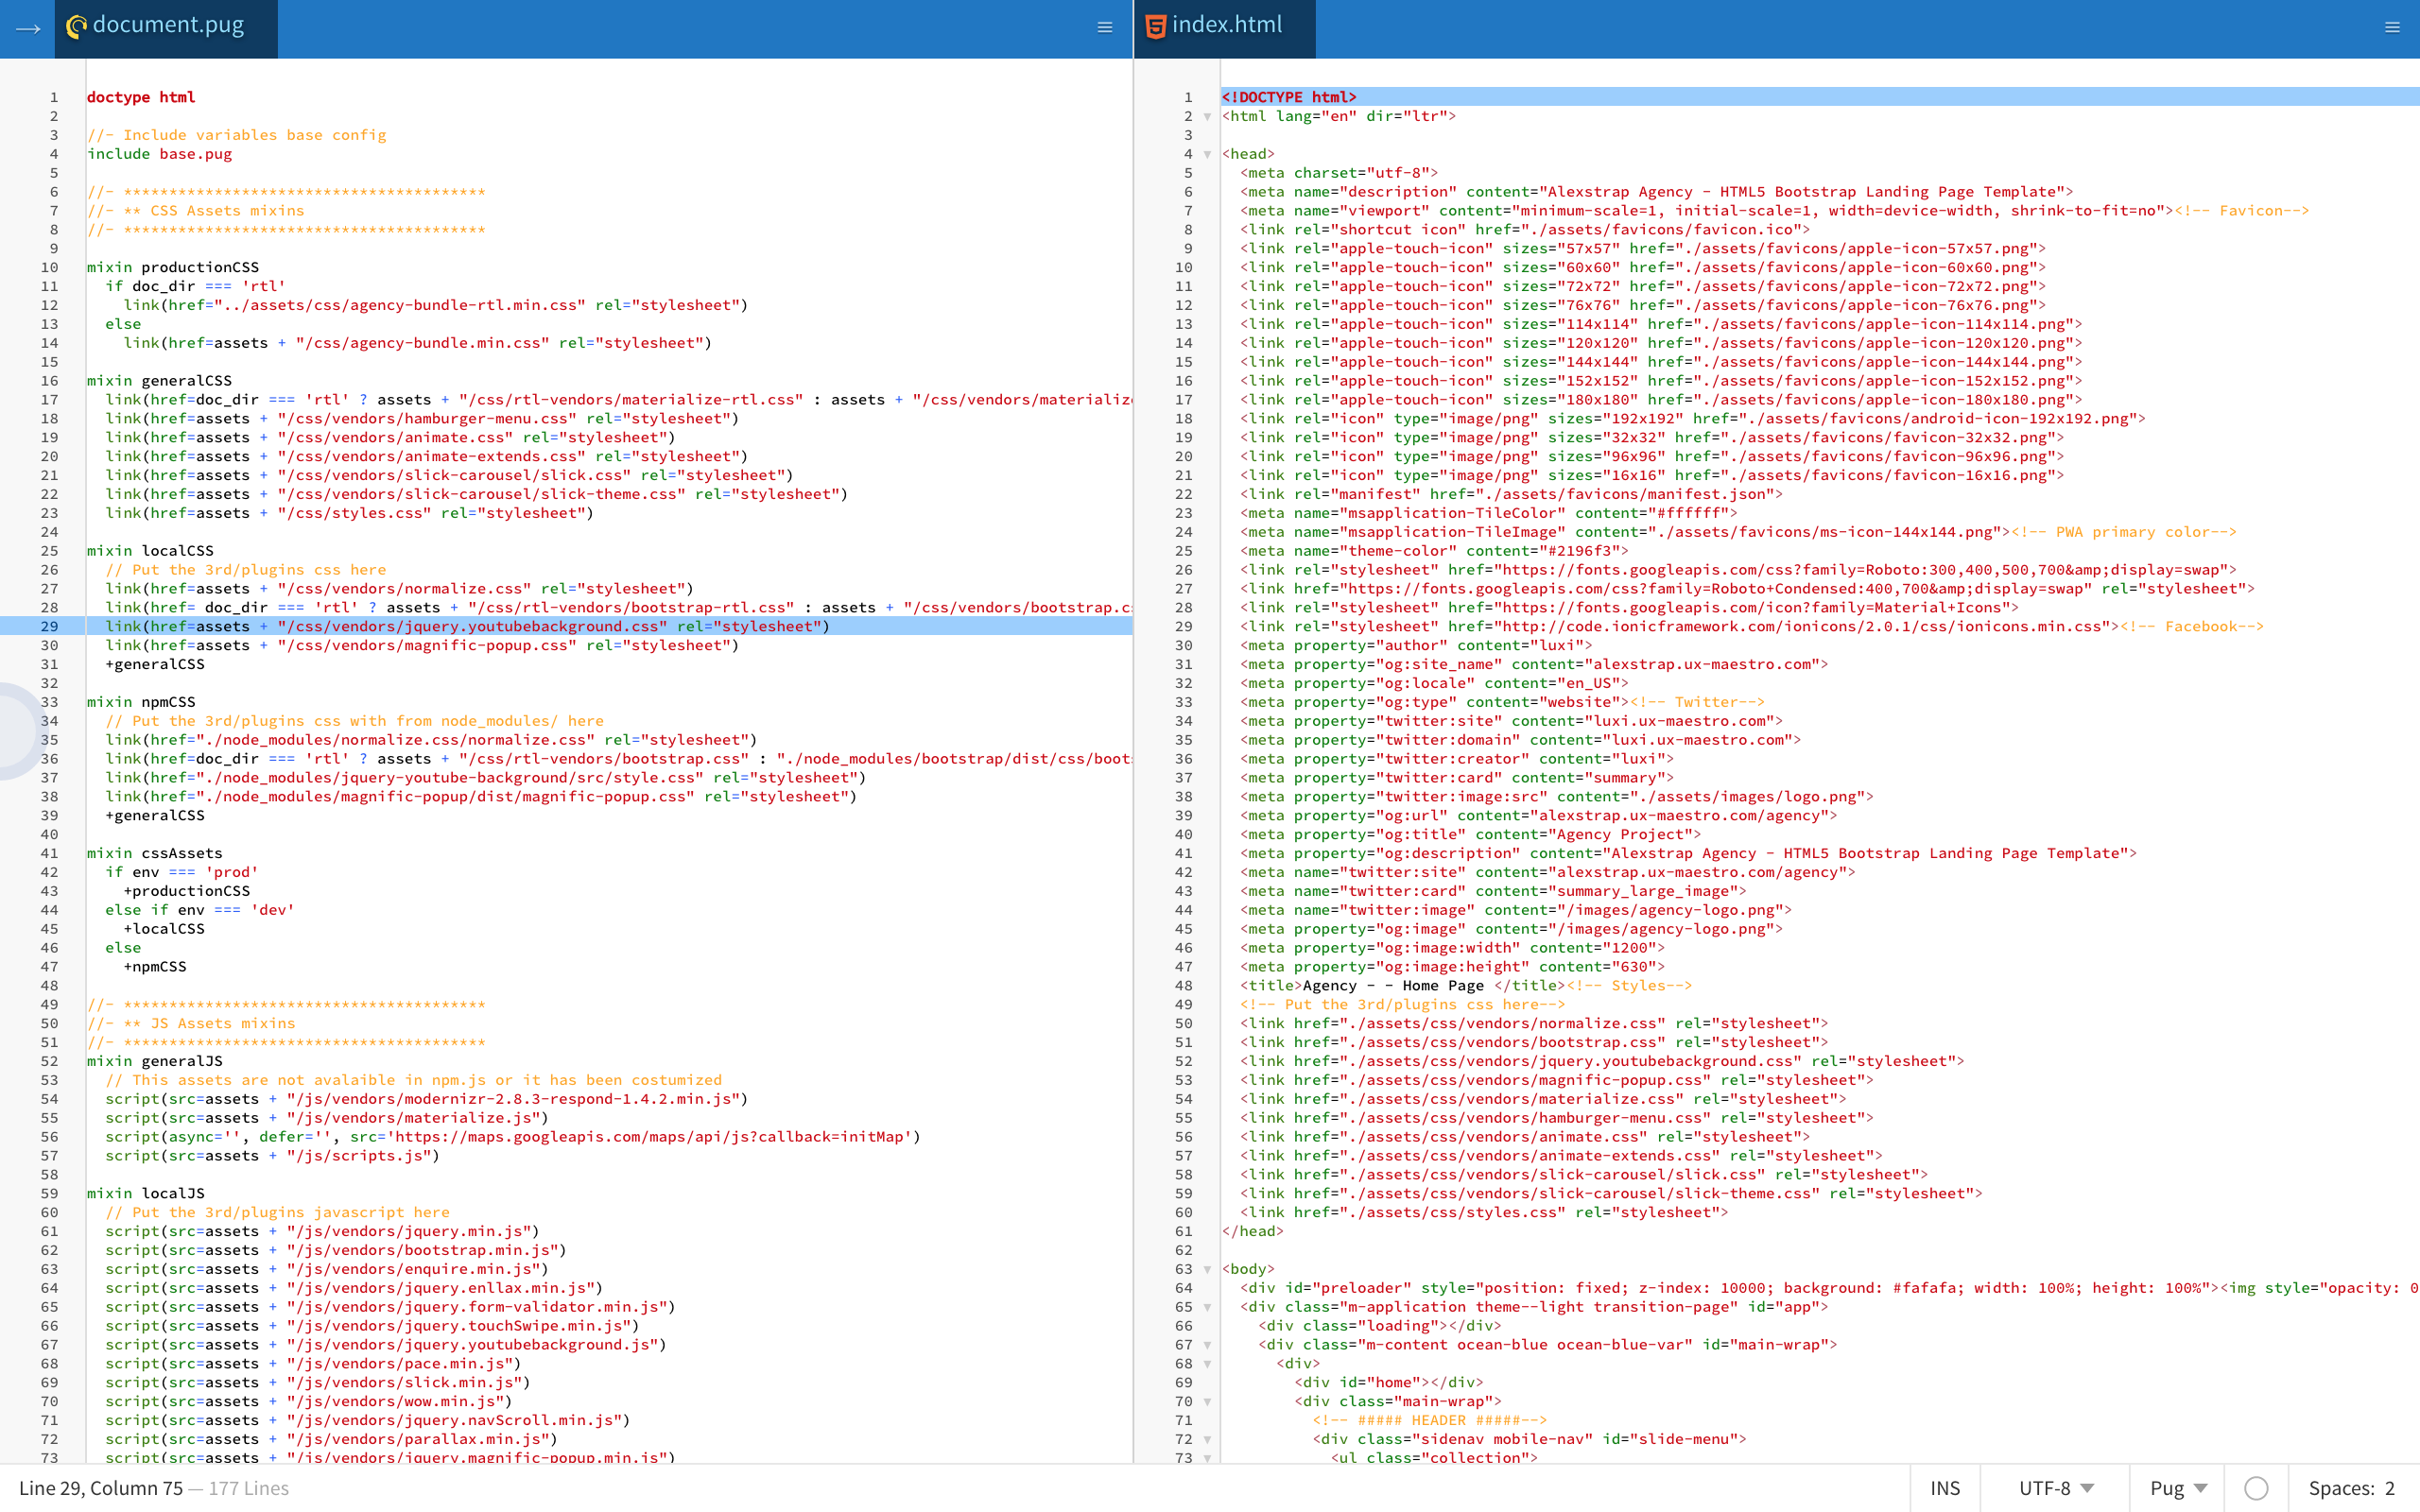
Header

You can put google analytics, font icon, embeded fonts, etc here: src/pug/layout/document.pug and index.html

code2

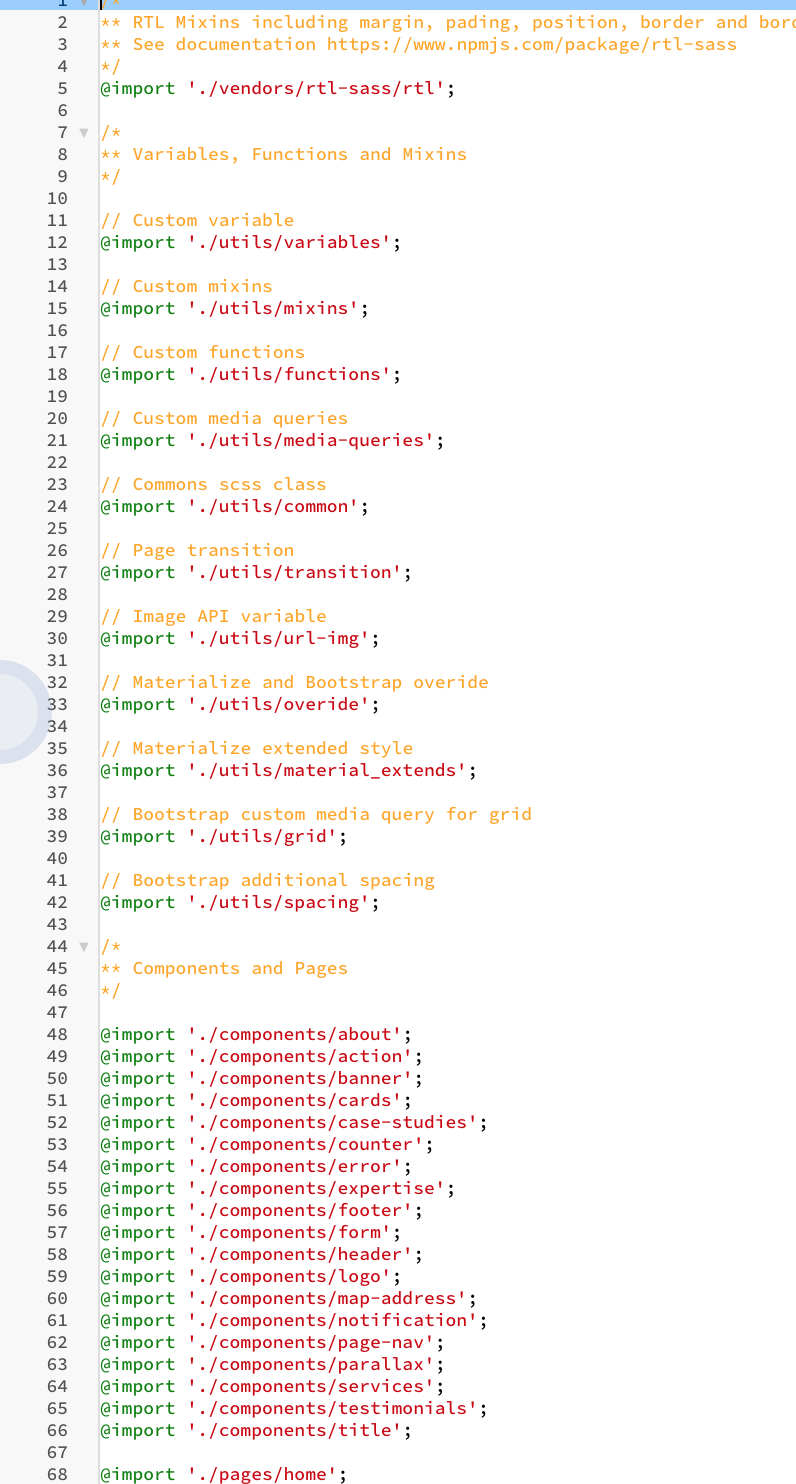
SCSS

/src/scss/styles.scss

code2


Directory and File

Name Directory Description Sample Use
Pug.js UI Components src/pug/components/ Modular HTML components written in pug.js include ../components/parallax/dot.pug
Images assets/images Store static images - HTML
<img src="assets/images/agency-logo.svg" alt="logo" />
- PUG
img(src=assets+"/images/agency-logo.svg" alt="logo")/
- SCSS/CSS
background-image: url(../images/agency-logo.svg)
SCSS src/scss Output destination: assets/css/styles.css @import './components/expertise';
JS src/js Output destination: assets/js/scripts.js Just create file in src/js then run gulp assets to merge in to assets
Dummy text and link src/api.json It use for pug.js only span #{brand.agency.name}

HTML and SCSS Generated by Gulp.js

Before work with the tasks bellow, please install all necessary packages by run npm install

  1. Build all files

    Source Result
    src/pug/pages/*.pug *.html
    src/scss/styles.scss assets/css/styles.css
    src/js/*.js assets/js/scripts.js

    This command use for build static HTML (converted from Pug.js exclude multi-language), scss and merge js

    gulp build

  2. Watch all files files

    Source Result
    src/pug/pages/*.pug *.html
    src/scss/styles.scss assets/css/styles.css
    src/js/*.js assets/js/scripts.js

    This command use for watch changes of static HTML (converted from Pug.js, exclude multi-language), scss and js

    gulp
    It will open the page in default browser automatically in port 900x. For example agency-theme will run in port:9001

  3. Build assets only

    Source Result
    src/scss/styles.scss assets/css/styles.css
    src/js/*.js assets/js/scripts.js

    This command use for watch changes of scss and js

    gulp assets

  4. Watch assets only

    Source Result
    src/scss/styles.scss assets/css/styles.css
    src/js/*.js assets/js/scripts.js

    This command use for watch changes of scss and js

    gulp watch_assets
    It will open the page in default browser automatically in port 900x. For example agency-theme will run in port:9001

  5. Translate

    Source Result
    src/pug/pages/*.pug mutlilang/[lang]/*.html

    This command use generate multi-language HTML. It's uses locale files from src/locale/*.json as translated library and generated by pugI18n

    Pug setup required, please change base.pug before run gulp command
    src/pug/layouts/base.pug
    
    //- Available env: dev, prod, and node_modules
    - var env = 'dev'
    
    //- HTML attribute
    - var doc_lang = 'en'
    - var doc_dir = 'ltr'
    
    //- Assets Path
    - var multilang = '../../assets'
    - var prod = '../assets'
    - var dev = './assets'
    
    //- Use assets path
    - var assets = multilang // Change this
                            
                                
    In Console/Terminal
    gulp translate
    The generated result will be placed in multilang/[lang]/*.html. For example for template with Bahasa Indonesia multilang/id/index.html

  6. Translate RTL

    Source Result
    src/pug/pages/*.pug mutlilang/ar/*.html
    src/assets/css/vendors/ src/assets/css/rtl-vendors/

    The gulp translate command is not make layout switched to RTL. You need run this command to generate multi-language HTML with RTL layout. It's uses locale files from src/locale/ar.json as translated library and generated by pugI18n

    Pug setup required, please change base.pug before run gulp command
    src/pug/layouts/base.pug
    
    //- Available env: dev, prod, and node_modules
    - var env = 'dev'
    
    //- HTML attribute
    - var doc_lang = 'ar' // Change this       
    - var doc_dir = 'rtl' // Change this       
    
    //- Assets Path
    - var multilang = '../../assets'
    - var prod = '../assets'
    - var dev = './assets'
    
    //- Use assets path
    - var assets = multilang // Change this                          
                                
    In Console/Terminal
    gulp build
    gulp translate_rtl
    The generated result will be placed in multilang/ar/*.html. If you have new languge with RTL required, it will placed on multilang/[new-lang]/index.html

  7. Build Production

    Source Result
    mutlilang/[lang]/*.html dist/[lang]/*.html
    src/assets/css/ dist/assets/css/
    src/assets/js/ dist/assets/js/
    src/assets/img/ dist/assets/img/

    This command is usually used for production purpose which is generate minified css, js even html.

    Pug setup required, please change base.pug before run gulp command
    src/pug/layouts/base.pug
    
    //- Available env: dev, prod, and node_modules
    - var env = 'prod' // Change this       
    
    //- HTML attribute
    - var doc_lang = 'en'
    - var doc_dir = 'ltr'
    
    //- Assets Path
    - var multilang = '../../assets'
    - var prod = '../assets'
    - var dev = './assets'
    
    //- Use assets path
    - var assets = prod // Change this                             
                                
    In Console/Terminal
    gulp build
    gulp translate
    gulp translate_rtl
    gulp prod
    The generated result will be placed in dist/.

Pug.js Coding


Follow this guide bellow to modify user interface, create pages, branding identity, language, etc.

External Reference

Here's some external reference of library that we used


Icons Used


Material Font Icons

  • Please make sure Google Material Icons already embeded in head tag
    If not just embed this inside head tag
    <head>
      <link rel="stylesheet" href="https://fonts.googleapis.com/icon?family=Material+Icons"/>
    </head>
  • Connect to internet
  • Then use it inside Vue templates. Example for use add icon
    <i class="material-icons">add</i>
  • Here's the cheatsheet for Material Icon https://materializecss.com/icons.html


IonIcons Font

  • Please make sure IonIcons already embeded in head tag.
    If not just embed this inside head tag
    <head>
        <link href="http://code.ionicframework.com/ionicons/2.0.1/css/ionicons.min.css" rel="stylesheet" />
    </head>
  • Connect to internet
  • The sample usage
    <span class="ion-ios-world-outline" />
  • Here's the ionicons cheatsheet https://ionicons.com/v2/cheatsheet.html


  • Sources and Credit


    Fonts :
    Lato

    Preview Images Used
    Unsplash
    Pixabay
    randomuser.me

    Note: All images are just used for Preview Purpose Only. They are not part of the template and NOT included in the final purchase files.


    Credits
    Name Repository License
    materializecss https://github.com/Dogfalo/materialize MIT
    animate.css https://www.npmjs.com/package/animate.css MIT
    jQuery https://github.com/jquery/jquery MIT
    Bootstrap https://github.com/twbs/bootstrap MIT
    Pug.js https://github.com/pugjs/pug MIT
    node-sass https://www.npmjs.com/package/node-sass MIT
    gulp.js https://github.com/gulpjs/gulp MIT
    gulp-pug https://github.com/gulp-community/gulp-pug MIT
    gulp-i18n-pug https://github.com/felixzapata/gulp-i18n-pug MIT
    gulp-saas https://github.com/dlmanning/gulp-sass MIT
    rtl-sass https://www.npmjs.com/package/rtl-sass ISC
    enllax https://github.com/mmkjony/enllax.js MIT
    jquery-navScroll https://github.com/jhammann/jquery-navScroll MIT
    slick https://github.com/kenwheeler/slick/ MIT
    wow.js https://github.com/graingert/wow MIT
    jQuery Youtube Background https://github.com/rochestb/jQuery.YoutubeBackground MIT
    gulp-rtlcss https://github.com/jjlharrison/gulp-rtlcss MIT
    jQuery form validator https://github.com/victorjonsson/jQuery-Form-Validator Dual licensed under the MIT or GPL Version 2 licenses